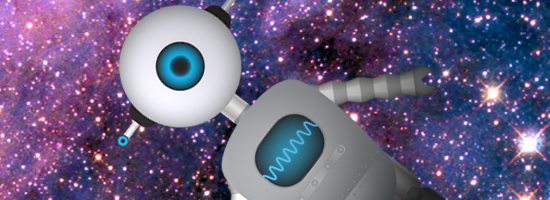
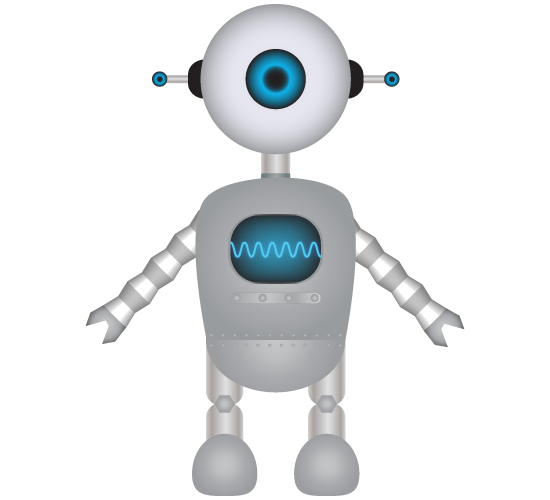
Here, at Yvelle headquarters, we try to inject a bit of fun in all that we do. In fact, we asked ourselves what would be a fun thing to do for our next tutorial? “A robot!” Not just any ordinary robot, a mascot of sorts. So this is it’s debut, introducing Yvelle iBot!
Robot Caricature Tutorial – Table of contents
Part 1: The Head and Neck – Involving gradients and creating shapes.
Part 2: The Arms and Legs – Creating & adjusting shapes, gradients, and using effects.
Part 3: The Body – Includes gradients, shapes, adjusting shapes, effects, and blending tool.
Part 4: Final – Finished robot image and downloadable files.
Adobe Illustrator CS5 was used to create the robot, but it is not limited to only that version of Illustrator. Past and present versions of CS may be used as well.
Let’s begin by creating a new document and setting the artboard to 550px width by 500px height.
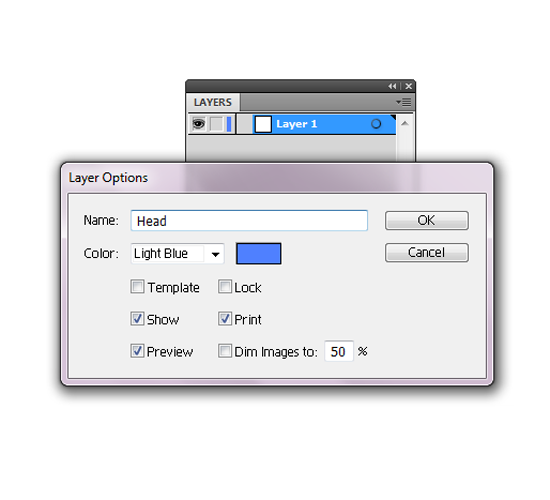
Open the Layer panel, double-click “Layer 1” and rename it “Head.” This will be everything from the neck up of the robot.
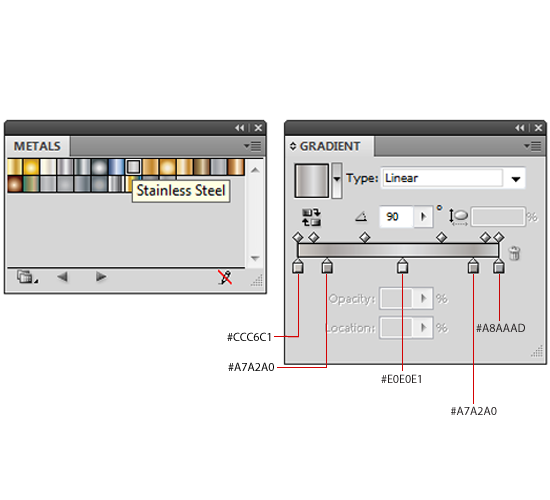
Open the Swatches Library and choose Gradients then Metals. Select “Stainless Steel” from pop up menu panel. If you do not have access to the gradient then open the gradient panel and choose Linear. These are the colors you need to emulate the Stainless Steel gradient in left to right order: #CCC6C1; #A7A2A0; #E0E0E1; #A7A2A0; #A8AAAD; #A8AAAD (underneath it is another gradient slider color that is #D1D3D5). Make sure the gradient angle is set to 90°.
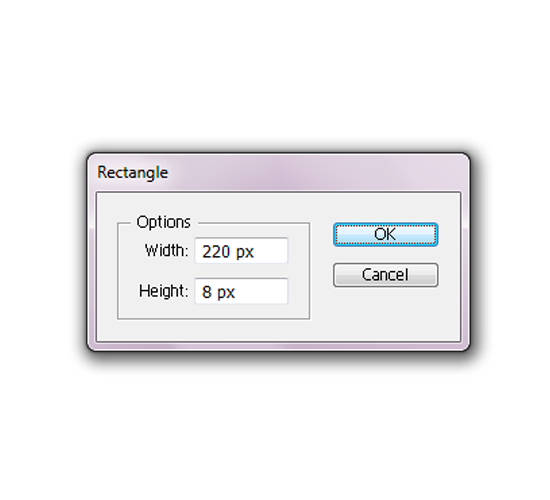
Using the Rectangle Tool (M), click on the page and set a size of 220px by 8px.
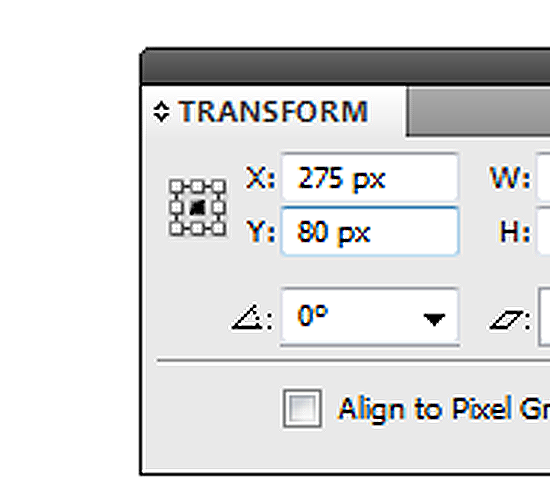
Set the newly created object with a X-Value of 275px and a Y-Value of 80px in the Transform panel.
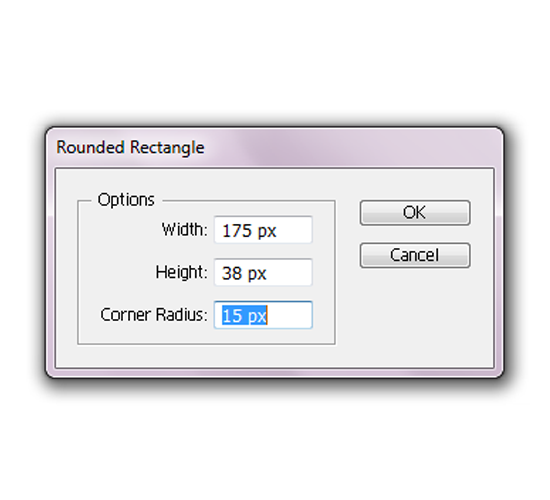
With the Fill (X) color set to #231F20, select the Rounded Rectangle Tool and click on the anywhere inside the artboard. Place the width to 175px and the height to 38px with a corner radius of 15px. A X-Value of 275px and a Y-Value of 80px in the Transform panel.
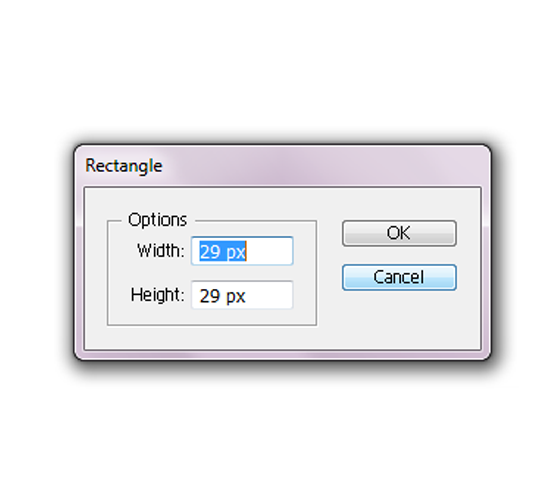
Using the same Stainless Steel gradient selected, change the rotation to 0° instead of 90° and choose the Rectangle Tool (M) then click on the artboard. Set the options to 29px by 29px.
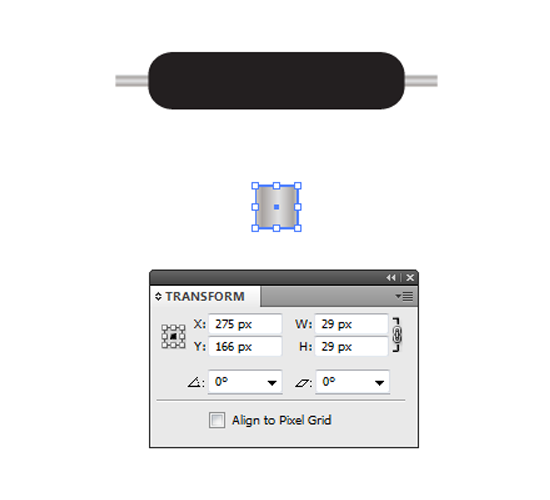
Set the X-Value to 275px and Y-Value to 166px.
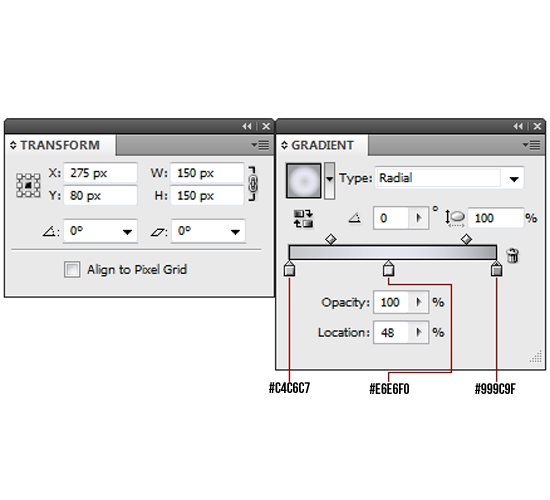
Create a new radial gradient. The gradient colors will be: #C4C6C7; #E6E6F0 (48% Location); #999C9F. Select the Ellipse Tool (L) and create a circle that is 150px by 150px. The X-Value is 275px and Y-Value is 80px.
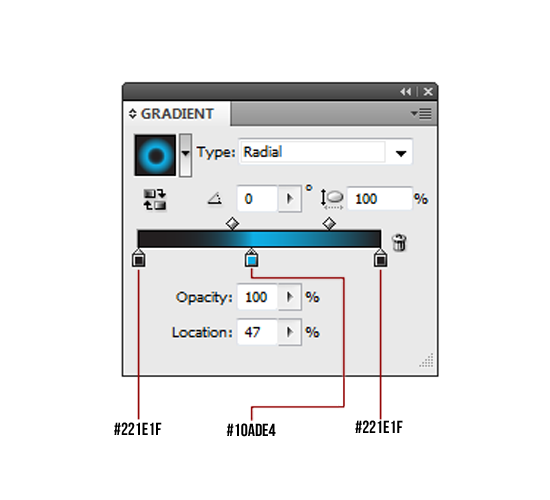
Create a new radial gradient with the following color sliders: #221E1F; #10ADE4 (47% Location); #221E1F. This will be the “pupil” of the eye.
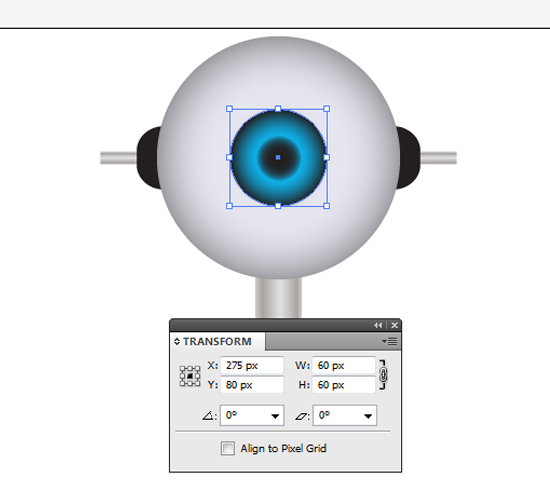
Open the Ellipse Tool (L) and create circle that is 60px by 60px. Set the X-Value to 275px and Y-Value to 80px.
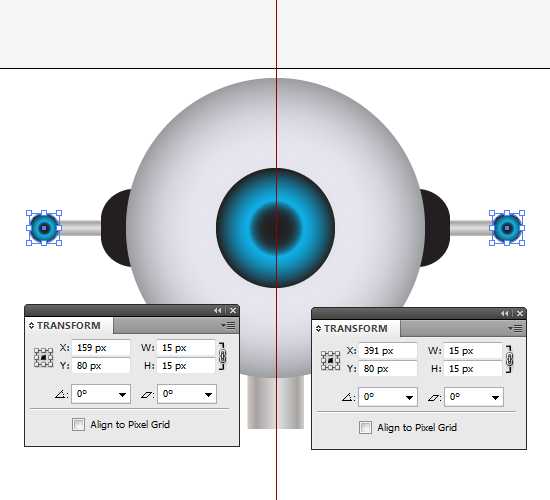
Using the same gradient as the Pupil, create a new ellipse that is 15px by 15px. Copy it and paste in front to make a duplicate. This will go at the end of the first rectangle Stainless Steel object. The left-side X-Value will be set at 159px and Y-Value will be set at 80px. The right-side X-Value is set at 391px with 80px Y-Value.
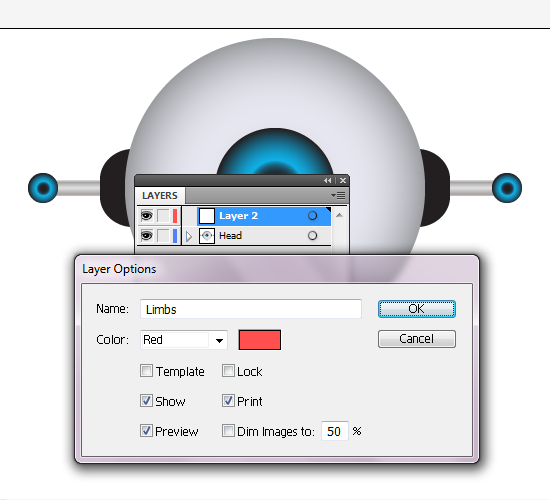
Open the Layers panel and create a new layer. Name this “Limbs.” This layer is basically the arms and the legs of the robot.
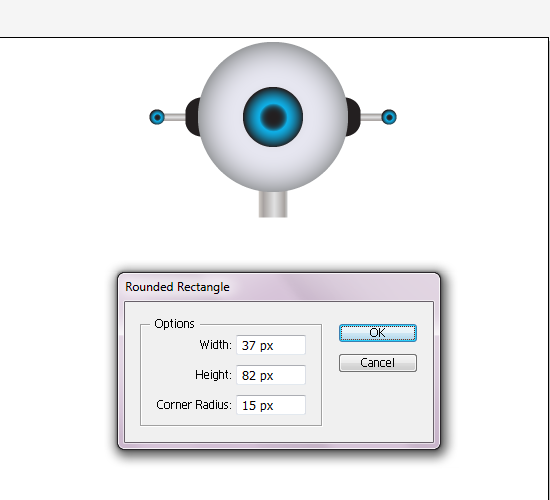
Let’s begin with creating the left leg. Select the Stainless Steel gradient, then create a Rounded Rectangular that is 37px by 82px with a corner radius of 15px.
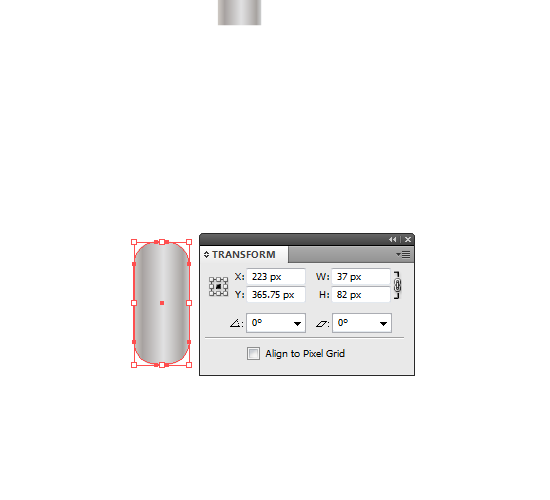
Set the X-Value to 223px and the Y-Value to 365.75px. This will not be the final location. When the rest of the Robot is assembled, there might be room for improvement or personal preference.
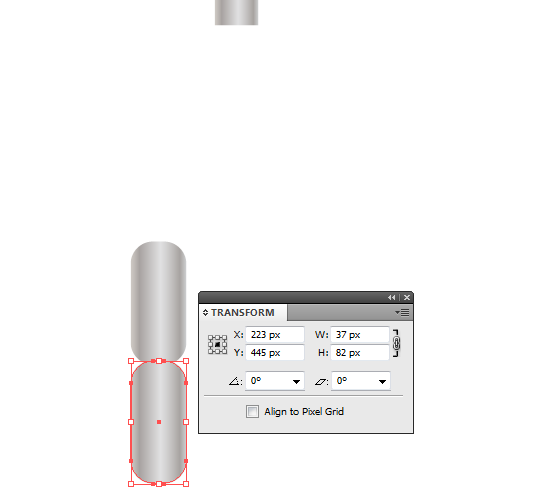
Select the rounded rectangle then Copy and Past in Front. Adjust the Y-Value to 445px.
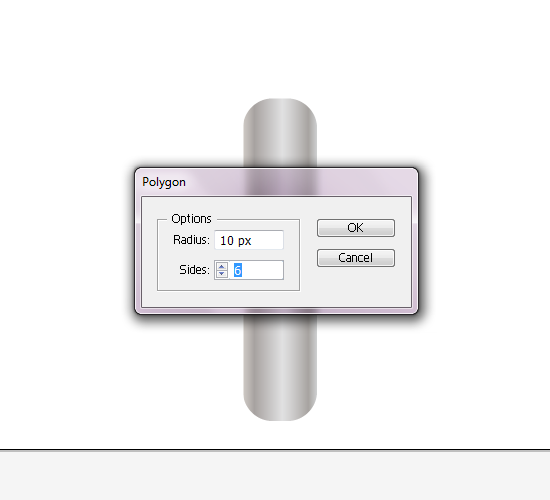
Select the Polygon Tool and set the radius to 10px with 6 sides.
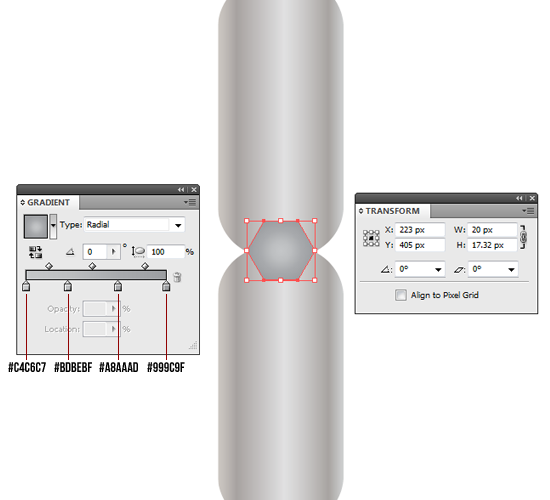
For the polygon shape, create a new radial gradient. Use the following colors for the gradient sliders: #C4C6C7; #BDBEBF (30% Location); #A8AAAD (66% Location); #999C9F. The X-Value should be set to 223px and Y-Value to 405px.
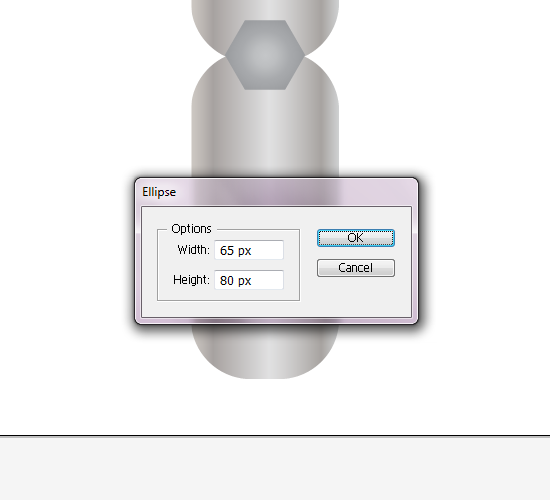
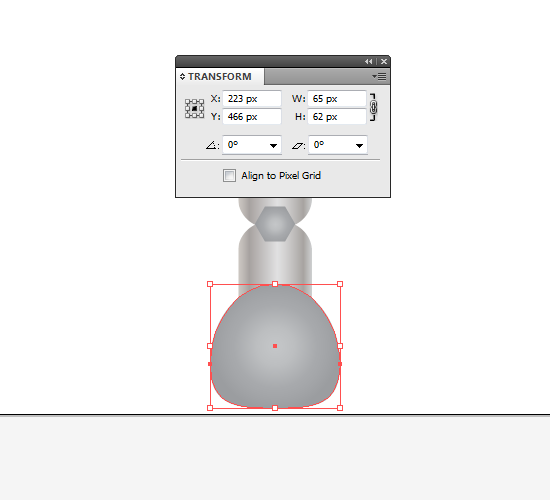
With the same gradient as the polygon shape selected, use the Ellipse Tool (M) to create an oval shape that is 65px width by 80px height. This will be the robots shoe/foot.
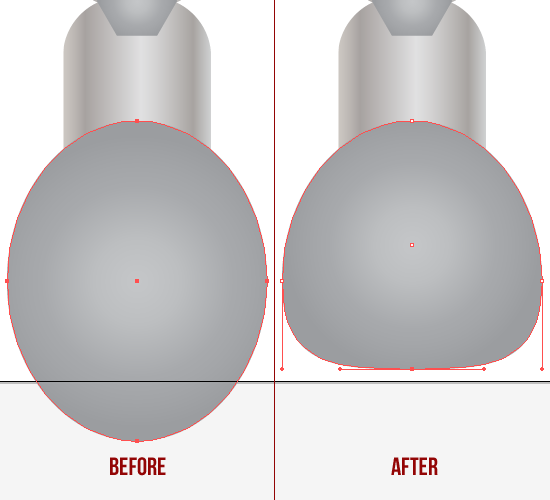
Select the Direct Selection Tool (A) and click the bottom anchor of the oval shoe. Move up the anchor 15px. The arrow up key on your keyboard moves the anchor 1px each press.
In the Transform panel, set the X-Value to 223px and the Y-Value to 466px.
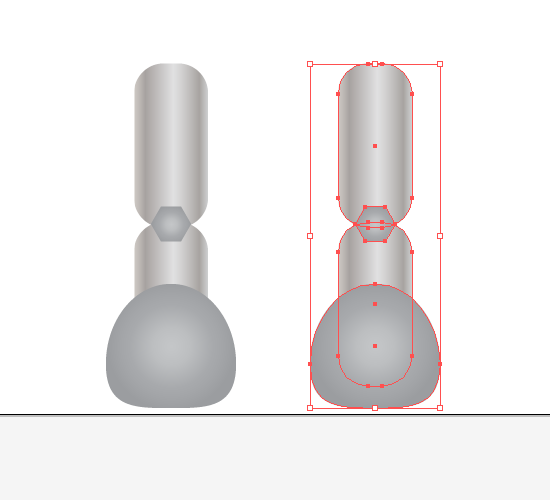
Select all of the leg with shoe and polygon shape. Copy and Paste in Front. In the Transform panel, change the X-Value to 325px. There should be two legs.
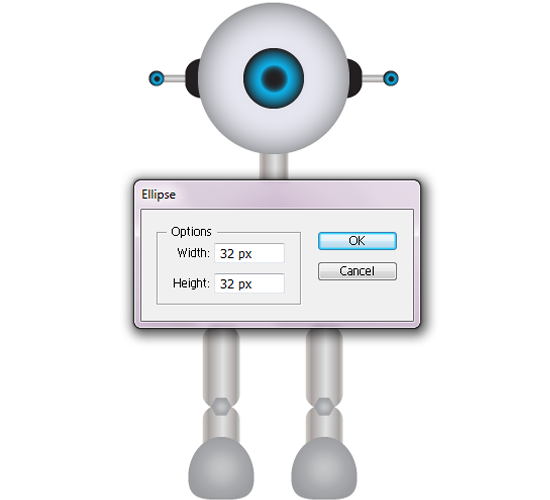
Let’s start on the arms. Using the Ellipse Tool (L), create a circle that is 32px by 32px with a Fill (X) color of white (#FFFFFF).
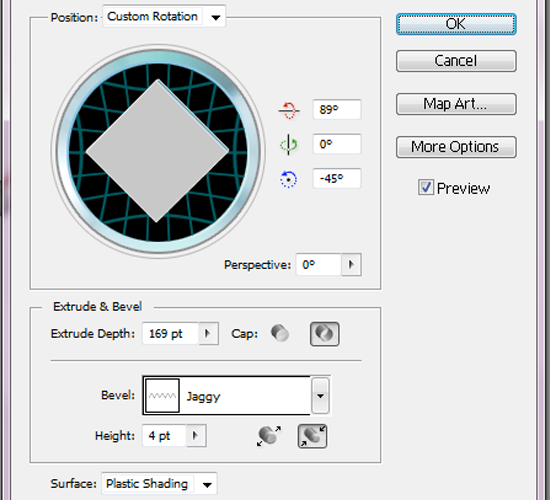
Now the circle doesn’t look like much right now, but that is the first step in creating a left arm. To make it look more like an arm, go to the Filter Menu and open the 3D submenu. Click on the “Extrude & Bevel…” option. Set the X-Axis rotation to 89°, the Y-Axis rotation to 0°, and the Z-Axis rotation to -45°. Leave the Perspective set at 0°, and change the Extrude Depth to 169 pt with the Cap turned off. Change the Bevel to Jaggy. Leave everything else as default.
To be able to adjust the arm, go to the Object menu and select Expand Appearance. It is now available to adjust size and rotation.
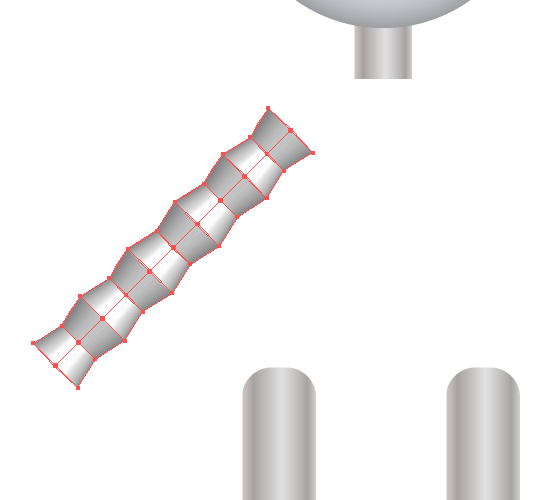
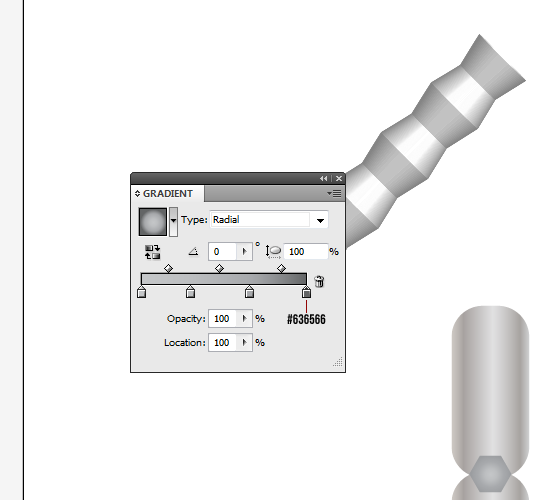
Using the radial gradient used in the shoe and polygon shape, make a minor adjust to the far right gradient slider (100% Location) by changing the color to #636566.
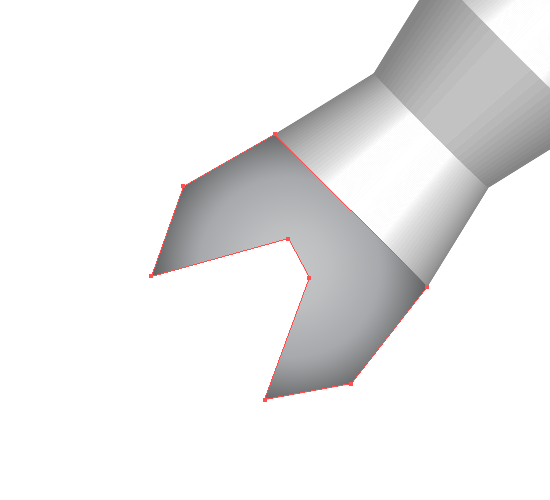
Using the Pen Tool (P) create a claw shape attached to the arm. It’s similar to a polygon with a rectangle cut out of it.
Select the arm and claw. Copy and Paste in Front. In the Object menu, select the Transform submenu and choose Reflect. Choose the Vertical Axis and click OK. Just created a right arm with claw. Move it to the other side. The exact location is not important for now. Personal preference will play in later.
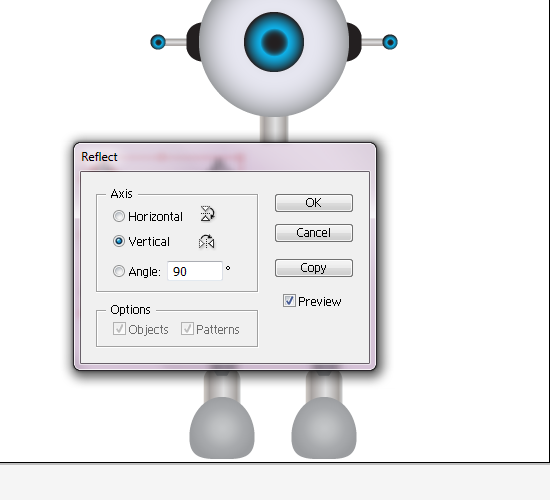
The exact location of the arms and claws are not important for now. Personal preference will play in later and you may want to add your own spin to the rotation of the arms and claw.
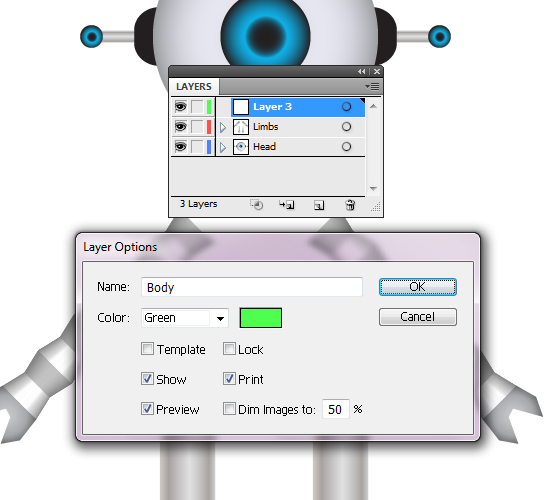
Create a new layer and name it “Body.” This is the final and most complicated portion of the robot layers.
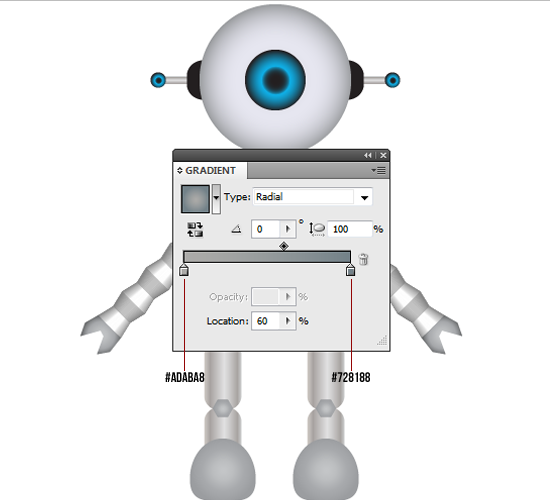
Create a new radial gradient. Set the first slider color to #ADABA8 and the ending slider color to #728188. Set the upper gradient (diamond) slider to 60% Location. This is the going to act as link between the neck and body of the robot. It’s purpose is purely detailing.
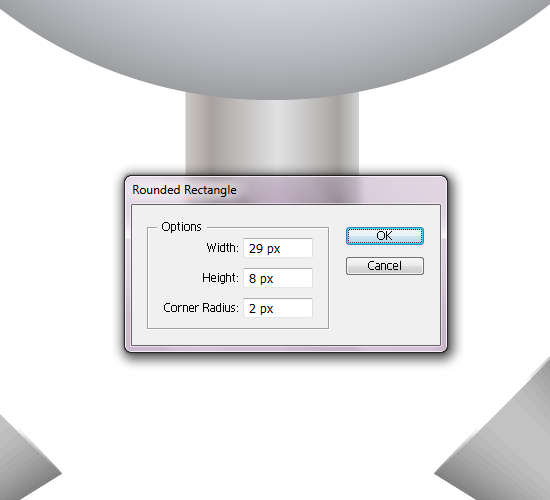
Using the Rounded Rectangle Tool, create a shape that is 29px width and 8px height with 2px corner radius. Move the shape to the end of robot neck shape. The X-Value should be 275px.
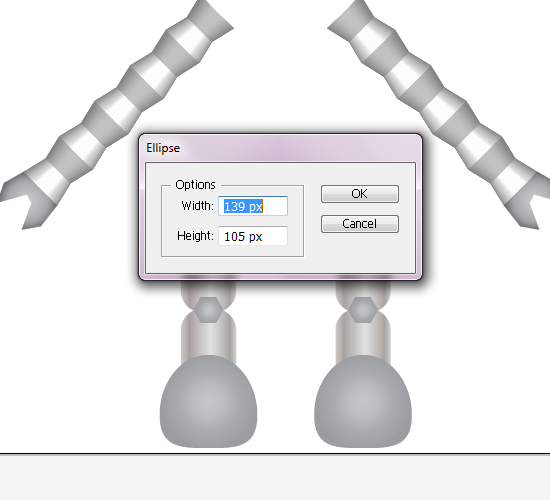
Using the same gradient as the shoe and polygon, create an oval shape using the Ellipse Tool (L) that is 139px by 105px. This will be the bottom portion of the body.
Create a rectangle shape using the Rectangle Tool (M) that is 139px by 143px with the same gradient as the oval shape. This is the upper body of the robot
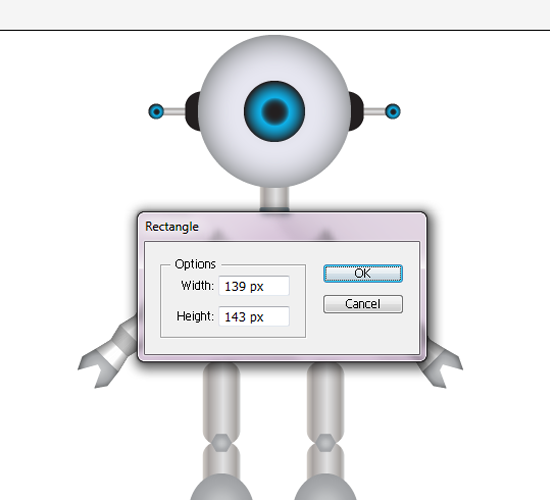
Place the upper body over the top half of the bottom body oval shape. Select both, and place over the top of the robots legs. There should be a significant about of space between the upper body and the neck. Select the Direct Selection Tool (A) and click on the top left anchor point of the upper body (rectangle). This will open an anchor bar of the window. Click on “Convert selected anchor points to smooth” button. This will round out the edge and give the upper body a shield shape.
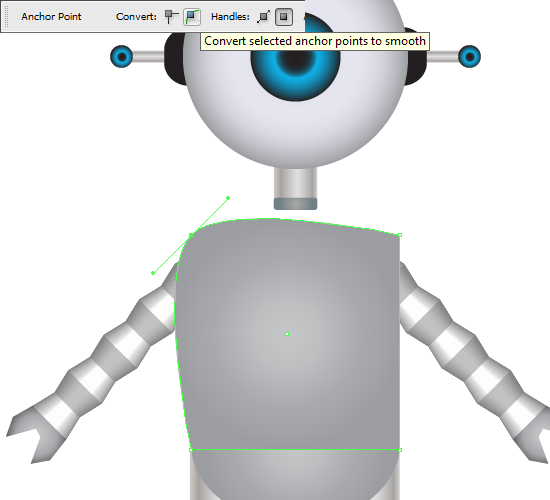
Do the same to the top left anchor point of the upper body. This will protrude the upper body shape attaching it to the neck robot. If it does not, adjust the positioning of the body and limbs to your personal preference making sure all parts are together. Adjusting the anchor points of the upper body may be necessary as well based on personal preference and structure unity clashes. Make sure there are no edges out of place.
Using the same gradient, create a circle shape using the Ellipse Tool (L) that is 3px in diameter.
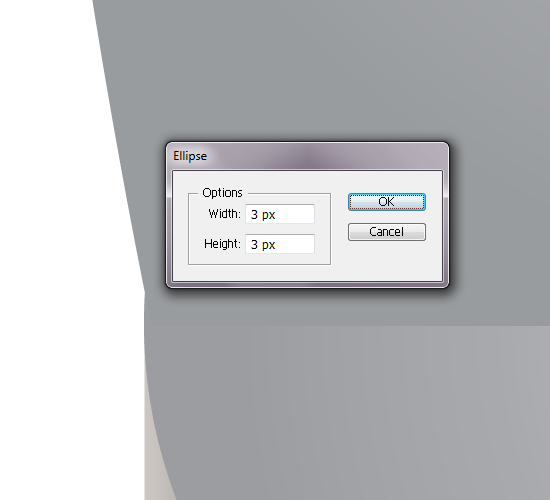
Place it at the bottom left corner of the upper body shape. Copy and Paste in Front. Move the newly duplicated shape to the other corner of the upper body shape. Select both left and right circular shapes. In the Object menu, choose the Blend submenu and choose “Blend Options…” Choose Specified Steps and type in 10.
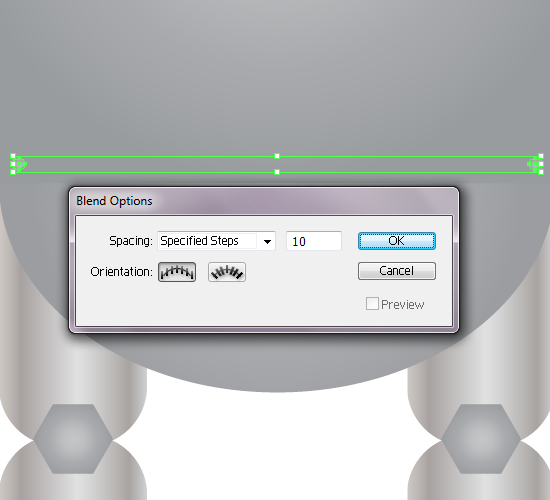
Copy and Paste in Front and move the duplicated down underneath the upper body about 10px. This gives the illusion that the upper and lower body are nailed together.
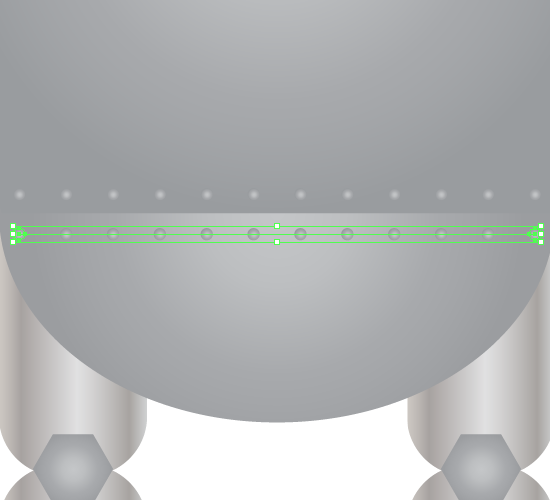
Create a new radial gradient with the colors #000000 and #95999B at each end. The upper slider (diamond) should be at 87% Location and the Aspect Ratio should be set at 600%.
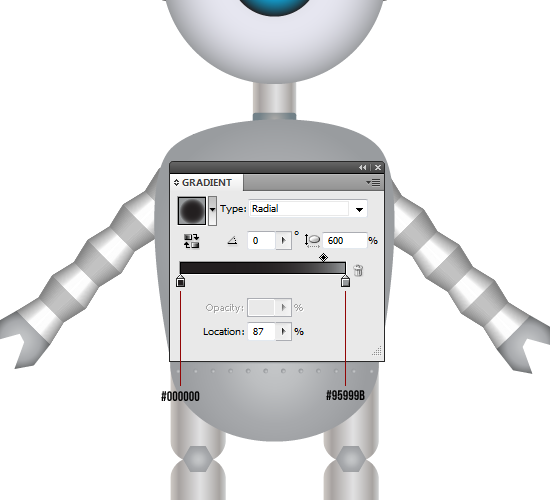
Create a Rounded Rectangle that is 95px by 70px with a 30px corner radius. Place it in the middle of the upper body in the chest area near the arms. Copy and Paste in Front the shape. Change the size to a width of 90px and height of 70px in the Transform panel. Change the Fill (X) color to #283035. This is going to be the communication screen.
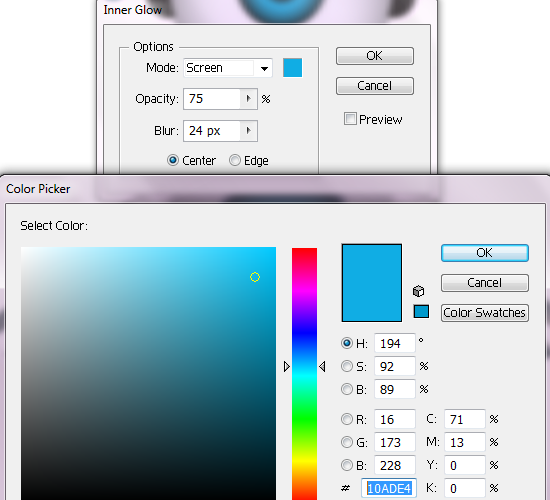
Select the newly pasted shaped only. In the Effects menu, select the Stylize submenu and choose Inner Glow. Set the color to #10ADE4 the blend mode to screen, leave the opacity to 75%, blur to 24px, and select Center option. Click OK.
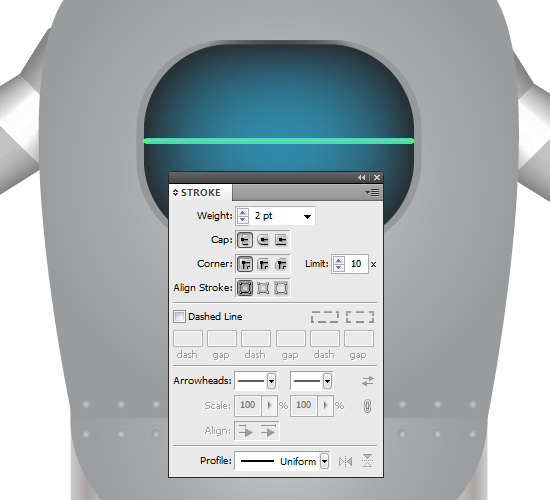
With no Fill (X) selected, set the Stroke to 2pt in the Stroke panel and the Stroke (X) color to #51CCED. Using the Pen Tool (P), create a line through the screen.
In the Effect menu, choose the Distort & Transform submenu and choose Zig Zag. Set the size to 7px, choose Absolute options, 12 ridges, and choose the Smooth option.
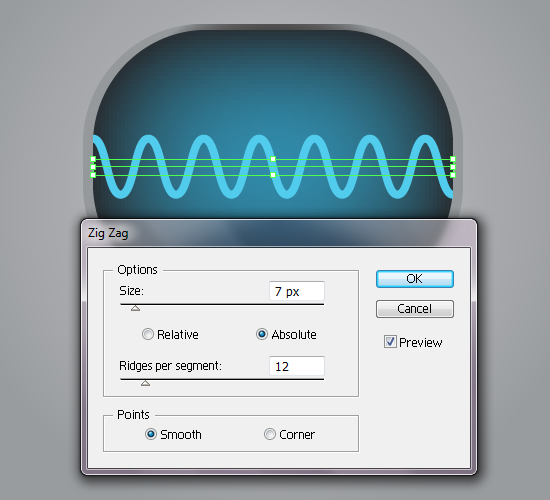
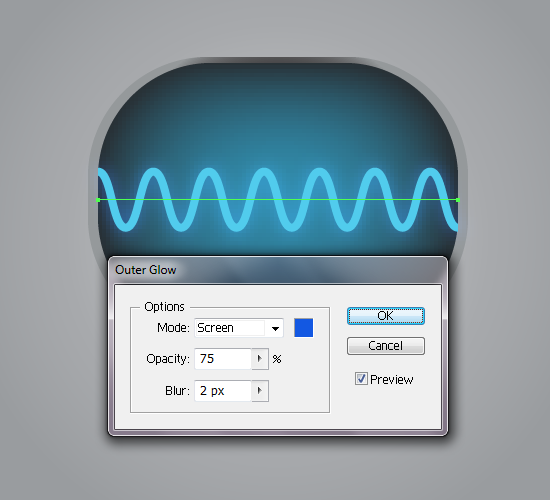
In the Effects menu, choose the Stylize submenu and select Outer Glow. Set the Screen color to #1358E2, opacity to 75%. and blur to 2px. Click OK.
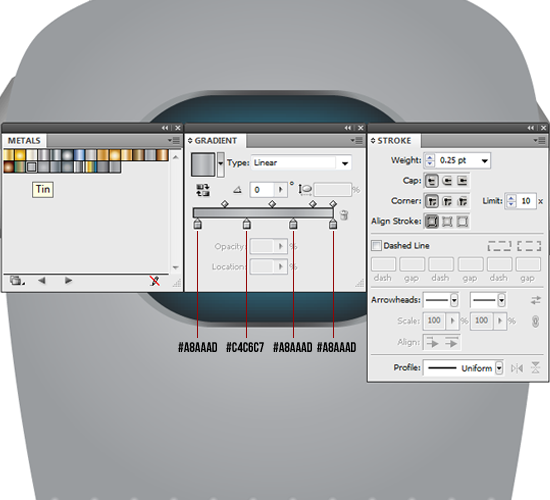
No screen would be complete without a console with buttons. Let’s begin with the console. Open the Swatches Library and choose Gradients then Metals. Select “Tin” from pop up menu panel for the Fill (X) color. If you do not have access to the gradient then open the gradient panel and choose Linear. These are the colors you need to emulate the Tin gradient in left to right order: #A8AAAD; #C4C6C7; #A8AAAD; #A8AAAD (underneath it is another gradient slider color that is #D1D3D5). The stroke is #898888 with 0.25pt weight.
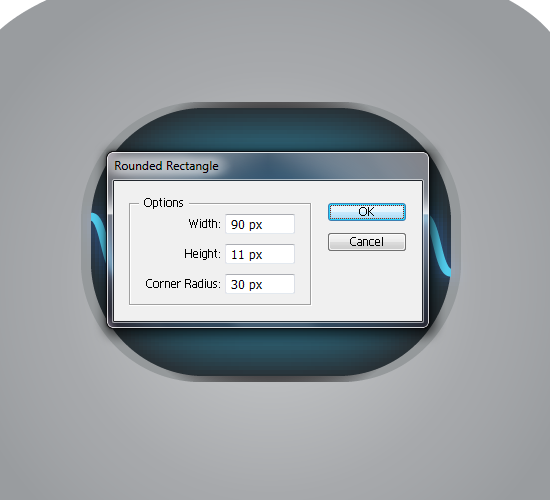
Create a Rounded Rectangle that is 90px by 11px with a corner radius of 30px. Place it approximately 10px underneath the screen.
Using the same gradient as the shoe and polygon tool, create a new Ellipse that is 8px by 8px. Place it in the left corner in the middle of the console.
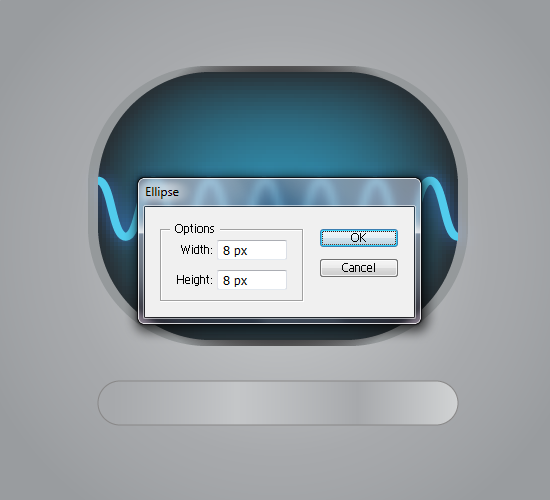
Copy and Paste in Front. Move the duplicate button to the other corner of the console.
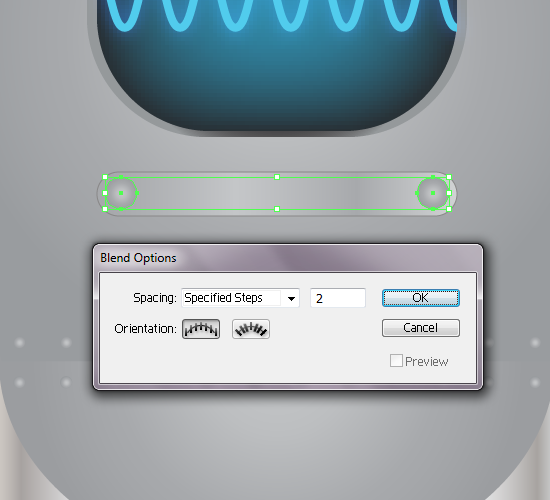
Select both buttons. In the Object menu, select the Blend submenu and then choose Blend Options. Set the Specified Steps to 2. Go back to the Blend submenu and choose Make.
Download AI File (Zip)

